When we found out we were pregnant, one of the very first gifts we received from my parents was a small crib. This crib was my Mother's when she was a child and has been passed around the family (cousins) for the past few years. My Mother was determined to track it down and reclaim it, which she did! However, the mattress was MIA, so she bought a new one. I absolutely adore the crib and it will be wonderful for the first few months, as we can keep it in our room. (I'm still debating on crib vs. co-sleeping, so this is a wonderful transitional crib while I decide.)
The only downfall of the small crib? It is an OLD crib that is a small/odd size. I could have ordered a custom fitted sheet for it, that would have lightened my purse by about $30. $30 for ONE SHEET?! Puh-lease... My solution, sewing!!
The first step was a trip to JoAnn's to find some cute fabric. I ended up going nuts and got TONS of different coordinating monkey and dot fabrics. Hint: more sewing projects and pictures to come! I then scoured Pinterest and came across two potential tutorial to try out. I ended up following Pretty Prudent's DIY Cute Crib Sheet Tutorial. It was a bit tricky the first time around, as I didn't provide enough room for the fabric to fold over the bottom of the mattress. Luckily, I used some random fabric for a "trial run" the first try. The second two sheets were a complete success once the kinks were worked out!! Below are some pictures. Let me know what you think!
Showing posts with label DIY. Show all posts
3/22/14
DIY Crib Sheets
Labels:
baby,
Baby DIY,
crib,
crib sheet,
DIY,
nursery,
sew projects
12/18/13
Free Christmas Tag Printables
In the spirit of Christmas, I would like to share some basic Christmas gift tags that I created the other day. You should be able to easily download and print them out. I tried to save them as a PDF but they didn't print correctly, so I ended up going with a JPEG.
They are pretty simplistic, but they look adorable when printed out on either recycled brown paper or white paper.
On top of using my crafting skills for the majority of the presents this year, I also wrapped them with things that I found around my house. The presents are wrapped in newspaper as a result of a quote I saw on Facebook from GASAN.
They are pretty simplistic, but they look adorable when printed out on either recycled brown paper or white paper.
On top of using my crafting skills for the majority of the presents this year, I also wrapped them with things that I found around my house. The presents are wrapped in newspaper as a result of a quote I saw on Facebook from GASAN.
"If every American family wrapped just three presents this holiday season in reused materials, it would save enough paper to cover 45,000 football fields. That's a lot of paper!"However, you could also use fabric remnants or recycled brown paper that you can pick up at Walmart (this is what my sister did). To glam up the newspaper I used some twine and yarn that I had sitting in my craft basket. I even created a couple of bows with some of the newspaper scraps! My inspiration for this entire thing can be found on my Christmas Pinterest Board. I think the simplistic tags look absolutely adorable with the newspaper, twine, yarn combo. What do you think?
Labels:
christmas,
christmas tags,
DIY,
eco-friendly,
free,
gifts,
green,
printable,
recycling
11/6/13
Changing Table Makeover
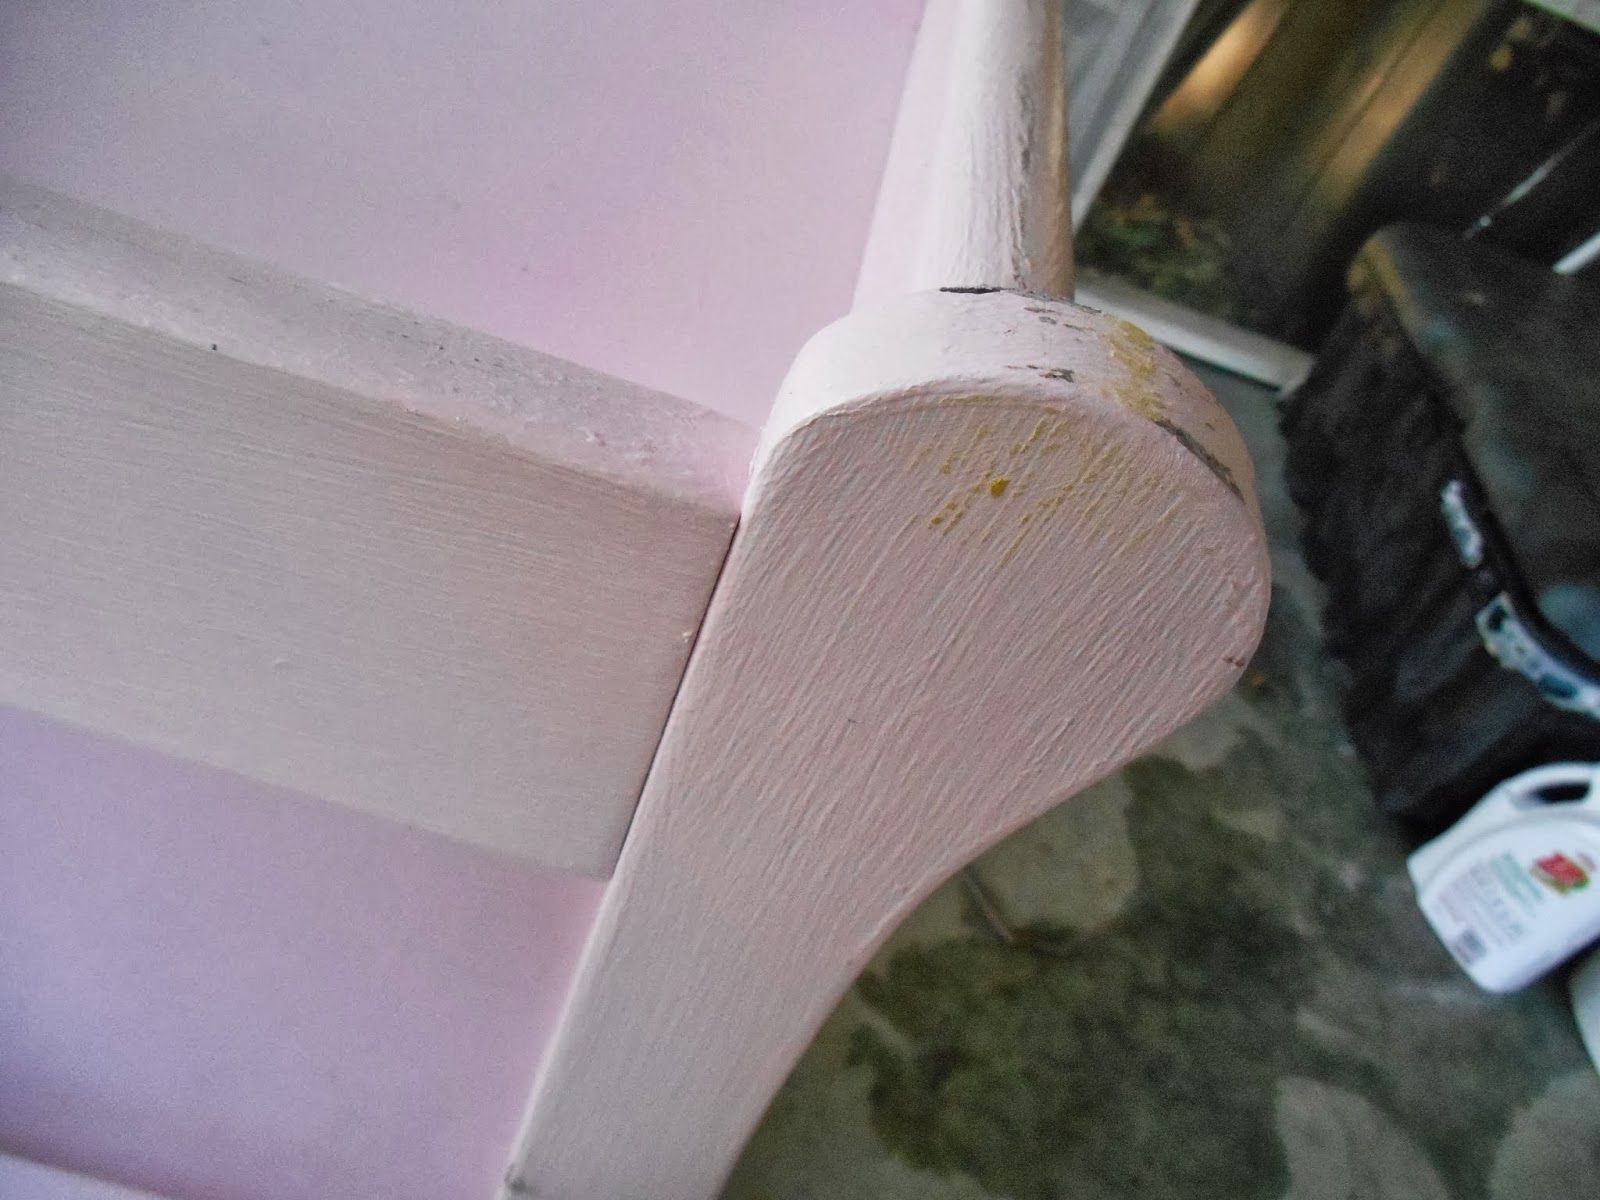
While I was originally going to simply put a changing pad on top of a dresser, I was able to get a changing table and baby bed at a yard sale for $100. The downside of the changing table was that it was pink. This called for a simple paint job. Luckily, the pink was a nice powder pink, not a bright screaming-in-your-face kind of pink. I'm not sure if you can even tell in the picture.
Honestly, I would have been changing the table color even if we were having a girl. The changing table is in the front room, since this is where we will spend the majority of our time and have the rocker. I grabbed the side table in the front room while I was at it. It was a left-over from the hubby's bachelor days and it shows.
I knew the changing table was going to be an easy fix, as it was wood. The side table on the other hand was laminate wood, and thus a complete headache. I grabbed some 1-2-3 Primer and a can of gray paint that was on sale at Walmart. I gave the side table two coats of primer and two coats of the gray paint. I gave the changing table three coats of gray paint.
I absolutely love how the changing table turned out. It's more of an antique gray-white that a harsh gray. It also happens to look fantastic with the changing pad cover that I picked up at Walmart a week before. I am starting to get excited now that I'm getting things ready!
I also really liked how the side table turned out. How could I not with how it looked before? Sadly, I have to report that even with the 2 coats of primer and 2 coats of gray paint, which I applied and let dry over an entire weekend (we're talking a minimum of 4 hours before I went for the next coat), some of the paint came off when we moved a coaster. I'm not talking about just some of the gray paint, I mean ALL the paint. Still, it works well enough to keep me happy with it until we eventually invest in new front room furniture. We are still using my old glass TV stand, which I cannot stand. Can you tell we are still renting? I can't wait until we buy a house and really start investing in some nice things. It's just not worth the headache of moving and damaging things right now. Happy Crafting!!
10/20/13
Monkey Mobile Tutorial
We decided to go with the monkey theme, so I began looking around at different types of mobiles. I really am never thrilled with the store-bought type. They are just way too cheesy for me.
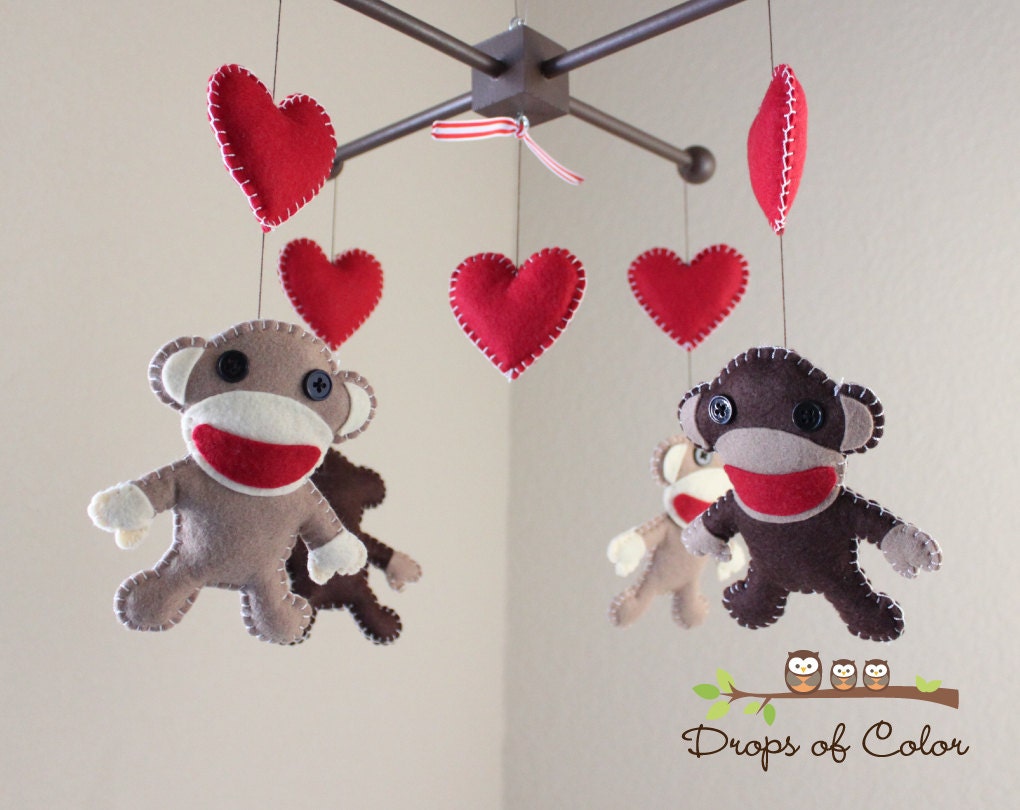
When I was trying to decide between a sock monkey and a regular monkey, I ran across this little gem from dropsofcolorshop on Etsy.
You will need to use the construction paper to create a template for you monkey. You have enough felt for 4 monkeys, keep in mind that you will need a front AND a back piece for the monkey. The template will basically need to be at largest half a sheet of paper/felt.
1. Fold the paper in half and then the top third of the paper down, this will be the portion allotted for the head of the monkey
3. Use the template to cut out 8 body pieces of the heavy felt.
4. Create a template for the face, eyes, ears, mouth, and belly.
5. Cut out the ear, face, and belly pieces in the lighter felt (you will need enough for 4 faces)
I don't have any in-process images for the next few steps... I will note that I only ended up using 3 of the 4 finished monkeys.
Step 2 - Assembling the Mobile
1. Drill 6 holes in the purse handle
2. Use the hemp cord to create the dangling parts of the mobile (I used one long piece to create two strings, which allowed me to use the excess string above to create my "handle")
3. Attach buttons to the string by threading through and tying nots (make sure to use a button at the very top to keep the string from slipping through)
3. Attach the monkeys to the end of three of the strings
4. Hang and enjoy!

If you make your own monkey mobile, or if you make a different mobile based off of this tutorial, please let me know! I would love to see how yours turns out. As always, feel free to contact me/comment if you have any questions.
When I was trying to decide between a sock monkey and a regular monkey, I ran across this little gem from dropsofcolorshop on Etsy.
So I set to the task of figuring out how to make my own monkey mobile. Before jumping into the tutorial, I'll show you my final project.
Here is how I went about it.
What You'll Need
- Monkey
- Construction Paper (or heavy weight printing paper)
- Felt (4 pieces of heavy-weight for the main body, 1-2 pieces of normal for your accent colors)
- Thread (the kind you used to make bracelets with)
- Normal weight thread (same or contrasting color as felt)
- Hot Glue Gun
- Mobile
- Buttons (multiple colors)
- Wooden Purse Handle - I found mine on sale for $2
- Hemp cord
Step 1 - Creating the Monkey
1. Fold the paper in half and then the top third of the paper down, this will be the portion allotted for the head of the monkey
2. Use circles to layout how you want the head, body, legs, and arms of the monkey and cut out the template.
3. Use the template to cut out 8 body pieces of the heavy felt.
4. Create a template for the face, eyes, ears, mouth, and belly.
5. Cut out the ear, face, and belly pieces in the lighter felt (you will need enough for 4 faces)
6. Cut out small eyes and the mouth in the darker felt
7. Attach the face pieces using your thread
8. Attach the face using a lighter color of thread
9. Begin hot gluing a front piece to one of the back pieces - first glue around the belly and legs, leaving the entire upper body untouched
10. Stuff the bottom of the monkey, continue gluing up the monkey and then put more stuffing in
**You can now either be done with the monkey or use the heavier thread to stitch around the outside. Below are images of both monkeys. I opted to stitch around the outside as it gives it a more polished look. I will note that this took a lot of time and I broke one of my needles, but I'm extremely happy with the final results.
Step 2 - Assembling the Mobile
1. Drill 6 holes in the purse handle
2. Use the hemp cord to create the dangling parts of the mobile (I used one long piece to create two strings, which allowed me to use the excess string above to create my "handle")
3. Attach buttons to the string by threading through and tying nots (make sure to use a button at the very top to keep the string from slipping through)
3. Attach the monkeys to the end of three of the strings
4. Hang and enjoy!

If you make your own monkey mobile, or if you make a different mobile based off of this tutorial, please let me know! I would love to see how yours turns out. As always, feel free to contact me/comment if you have any questions.
7/29/13
Facebook Announcement
So today I had a routine checkup at the doctor. I'm at 11 weeks now, and have been waiting patiently to post the good news to FB until we were further along. I am one of those who spent long hours on Pinterest and Google searching for different ways to announce a new baby. As this is our first, I had a completely blank slate! I had a few ideas, but luckily some were weeded out as FB friends began posting their pregnancy news using my ideas the past few weeks... go figure! I was sold on the ideas of a pair of shoes. But not just any shoes. The Hubby and I have a love for river shoes (Keen & Chacos) so we had to go with sandals for sure. Sadly, I'm too cheap to buy a baby pair of Keen or Chacos so I went with a cheapy brown pair I found at Walmart. I got the smallest size they had, which will still be too big for the little turd. However, I imagine they will eventually be put to use, and they were worth the $5. =) So in anticipation, I had my Mom take a photo of our feet with a little pair of shoes and then had some fun with Photoshop. I decided that the FB announcement would be best done as a cover photo, that way anyone who visits my page will immediately see the good news along with the due date.
I really loved this first attempt. However, after thinking about it for a couple minutes, I quickly realized the majority of the left column would be covered with my pictures. So I had to do some minor readjustments until I was able to produce my final version.
This allowed the entire announcement to be seen, not only for the original post but also while acting as my FB cover. I really love how this turned out. The next thing I will do, is update my profile picture to be something sweeter. I have a few ideas that I have pinned on Pinterest, but haven't decided for sure yet. I imagine I will keep this as my cover for the majority of my pregnancy, unless I come up with something else that I really love.
I was able to get the bear graphic from ScrappyNat. Many thanks!! The fonts I used were retrieved and downloaded from Google Fonts. I highly recommend Google Fonts if you haven't tried it before. It is an amazing resource of free fonts that can also be used on webpages. I hope this gives a few people some ideas for their own FB pregnancy announcement! More fun diy baby things are sure to come.
I really loved this first attempt. However, after thinking about it for a couple minutes, I quickly realized the majority of the left column would be covered with my pictures. So I had to do some minor readjustments until I was able to produce my final version.
This allowed the entire announcement to be seen, not only for the original post but also while acting as my FB cover. I really love how this turned out. The next thing I will do, is update my profile picture to be something sweeter. I have a few ideas that I have pinned on Pinterest, but haven't decided for sure yet. I imagine I will keep this as my cover for the majority of my pregnancy, unless I come up with something else that I really love.
I was able to get the bear graphic from ScrappyNat. Many thanks!! The fonts I used were retrieved and downloaded from Google Fonts. I highly recommend Google Fonts if you haven't tried it before. It is an amazing resource of free fonts that can also be used on webpages. I hope this gives a few people some ideas for their own FB pregnancy announcement! More fun diy baby things are sure to come.
Labels:
baby announcement,
DIY,
Facebook Baby Announcement
6/27/13
DIY Underbust Corset
I received a sewing machine from my mother for Christmas about 7 years ago. Since then, I have taken up several projects to try to develop my "sewing technique" mainly they were small things like making throw pillows, recovering some cushions for a glider, and sewing a t-shirt memory quilt (which I have yet to complete). In addition to those odd projects I have tried to sew a Halloween costume each year. The first year, I made a simple Jedi cloak that turned out really well. The second I made an Sally Jupiter dress (Watchmen) that turned out fairly decent.
As you can see, I went with newspaper to cut out my pattern. You can either by a pattern to use, or follow one of the many tutorials out there to make a custom pattern. Custom patterns seem to be trial and error for me so far, so don't get discouraged if you find you have to alter things along the way!
Since I am just learning, and I wasn't sure if this would even turn out right, I used some upholstery fabric that I had gotten at a yard sale. From everything I had read, I knew that I needed something durable and not very stretchy so that it would hold its shape well.
Once you have your fabric picked out, use your pattern to cut your fabric. Remember to add on to your measurements for the seam allowance, this is always what gets me!! You will want to cut out four pieces of fabric for each pattern. This will give you enough panels for the two complete corsets. You want to do this, because you will need your inside lining as well as your outside.
Based on your seam allowance, align your panels up so the pattern sides are facing each other. As you can see, I used my pattern to help me correctly line the panels up.
Once you have them aligned and have used push pins to hold the materials in place, start sewing! I played around with the types of stitch that I used until I felt like it was a solid stitch. I hope to be more technical in future tutorials!!
Once you have slit your seams so they are laying better. You need to go back around and stitch them into place. You may want to iron them down first so they are laying well. Through my research I found two different ways to do this. Some people suggest separating the extra fabric and stitching it down on each side of the seam. My fear is that this would weaken the seam. I went with the second option, which is to lay it down towards the back and place one stitch per seam. This should strengthen your seams. Which I desperately needed, this being my first time!
Once you have sewed all your panels and stitched your seams down. You should end up with something that looks like the above image. Remember, you will want to do this entire process again, so that you have your inside lining as well as your outside corset.
This step will help stabilize your corset. You can choose not to add interfacing to your panels, but it is fairly cheap and will make a huge difference in the final product! I bought some simple iron-on interfacing from JoAnn fabric. I actually went to the store and got about 3 yards, so the cost was as outrageous as you would think if you look online at the 25 yds.
Now I will say that this stage can potentially damage your corset. This is when I added the two additional front panels that would be housing my grommets. (I told you I do things out of order!). There are several grommets that I had bite through the fabric as I pounded them too hard. This caused some of the interfacing to show and my solution was to go back and hand-stitch around the grommets to help keep it from tearing further. Overall, I don't think it turned out too badly for my first piece. I also think that my next attempt at a corset and grommets will be much better thanks to the practice! You can see where I doubled stitches to stabilize the pieces together.
Last year I decided to go less iconic/geeky but push my sewing further by doing a pirate costume. I really wanted an underbust corset for this, so I set out on my journey to figure out how to make a custom pattern. I ended up somewhat following this tutorial from Katafalk. However, I really wanted a closed back and a laced front, so I altered the pattern for my needs. I ended up having 3 pattern panels cut out, which translated into an 6 panel corset. I ended up added two panels to the front for my grommets at the end, which made the corset an 8 panel underbust. As I said, this is a learning process for me. So down to my quick tutorial on how I constructed the corset. This picks up after you have your pattern cut out.
Step 1 - Cut out pattern
As you can see, I went with newspaper to cut out my pattern. You can either by a pattern to use, or follow one of the many tutorials out there to make a custom pattern. Custom patterns seem to be trial and error for me so far, so don't get discouraged if you find you have to alter things along the way!
Since I am just learning, and I wasn't sure if this would even turn out right, I used some upholstery fabric that I had gotten at a yard sale. From everything I had read, I knew that I needed something durable and not very stretchy so that it would hold its shape well.Once you have your fabric picked out, use your pattern to cut your fabric. Remember to add on to your measurements for the seam allowance, this is always what gets me!! You will want to cut out four pieces of fabric for each pattern. This will give you enough panels for the two complete corsets. You want to do this, because you will need your inside lining as well as your outside.
Step 2 - Sew the panels together
Based on your seam allowance, align your panels up so the pattern sides are facing each other. As you can see, I used my pattern to help me correctly line the panels up.
Once you have them aligned and have used push pins to hold the materials in place, start sewing! I played around with the types of stitch that I used until I felt like it was a solid stitch. I hope to be more technical in future tutorials!!
Step 3 - Slit your seam allowance
After sewing all the panels together, you should notice the panels won't fold well. This is due to the seam allowance keeping the panels straight. Use your scissors to slit the seam allowance at an angle for each curve in your fabric. This should allow the panels to lay correctly.
Step 4 - Sew your seams
Once you have slit your seams so they are laying better. You need to go back around and stitch them into place. You may want to iron them down first so they are laying well. Through my research I found two different ways to do this. Some people suggest separating the extra fabric and stitching it down on each side of the seam. My fear is that this would weaken the seam. I went with the second option, which is to lay it down towards the back and place one stitch per seam. This should strengthen your seams. Which I desperately needed, this being my first time!Step 5 - Repeat steps 1-4 for Lining
Step 6 - Add Interfacing
This step will help stabilize your corset. You can choose not to add interfacing to your panels, but it is fairly cheap and will make a huge difference in the final product! I bought some simple iron-on interfacing from JoAnn fabric. I actually went to the store and got about 3 yards, so the cost was as outrageous as you would think if you look online at the 25 yds.
Step 7 - Sew your corset and lining together
This is a fairly simple step. I recommend doing this after adding your interfacing because it will be much easier. You simply take both corset panels (lining and outside) and place them pattern side together. Then you will sew up each end.
After sewing up each end, turn your corset right-side out. You will now have to ask yourself the age old question of "To bone or not to bone". If you are wanting a basic costume piece, it isn't all that necessary. If you want something that will hold its shape fairly well, I would recommend going for the plastic boning. It worked well on my piece that I wore the entire night. The steel boning is for the pros, and although I may get there at some point, it is mainly for when you want to really cinch your waste rather than just for a costume piece.
If you decide that you want to add boning, now is the time to decide where it will be placed. I went fairly simple with mine, as it is a costume piece. I added boning to the front panels to stabilize where my grommets would be. I also added two pieces to the back panel, as it was fairly simple and I didn't want it drooping. And one piece to each side. At this point, you will want to sew pockets for where you want to slide the boning in. I also recommend adding a few more stitches from top to bottom along several seams to ensure that your corset and lining will remain in place properly.
Step 8 - Add the boning
I purchased my plastic boning from amazon. I ended up getting two packages due to the awesome price. Did I mention I'm fairly cheap? I figured I might as well get my money's worth for the shipping & handling! I was extremely happy with the semi-flexible plastic boning. It was easy to cut to the exact size I needed. I removed it from the fabric covering and slid it directly into the seams that I wanted it in. I then simply ran a stitch around the entire top and bottom of the corset, effectively closing them in their places.
Step - 9 Add grommets
This was a definite trial and error stage. I ended up heading back to JoAnns to get a hole widener tool and the grommet kit shown below. I felt it was fairly reasonable, and since I was so close to being done I couldn't resist the finishing touches that this would give!
Now I will say that this stage can potentially damage your corset. This is when I added the two additional front panels that would be housing my grommets. (I told you I do things out of order!). There are several grommets that I had bite through the fabric as I pounded them too hard. This caused some of the interfacing to show and my solution was to go back and hand-stitch around the grommets to help keep it from tearing further. Overall, I don't think it turned out too badly for my first piece. I also think that my next attempt at a corset and grommets will be much better thanks to the practice! You can see where I doubled stitches to stabilize the pieces together.Step 10 - Finish off the edges
At this point you should have a fairly complete looking corset. However, your edges will be looking pretty shabby compared to the awesomeness that is your corset. I went pretty basic with this and decided to use a ribbon to finish off my edges. To do this, you sew the top of the ribbon to the front of your corset. You then fold the ribbon over and stitch it again so that it is attached to the inside lining. You will do this for the entire top and bottom of your corset.
All that is left is to get some cord for to put through your grommets and finish off your outfit! I used threadbanger's How to Make a Girl Pirate Costume tutorial to help me make my puffy pirate shirt. Then I grabbed a pair of capri dress paints, a belt, and my brother's wooden katana! The hubby was easier in that we grabbed him a pair of ribbed khaki shorts and an old button up. Overall, I think this was one of the best Halloween costumes that I have made so far! Now I am trying to decide what to make this year. *evil grin*
Labels:
DIY,
Halloween costume,
pirate costume,
sew projects,
tutorials,
underbust corset
Subscribe to:
Posts (Atom)